This article is all about me engraving a Lian Li PCV1000B, to turn it into a Star Wars tribute case. Doing engravings with a Dremel is something that just becomes more and more popular, so after a successful Hellraiser mod, I'm back for another go. I'll be giving some tips and pointers in this article that will hopefully be of some help, and maybe will inspire you to start doing some Dremel-work yourself.
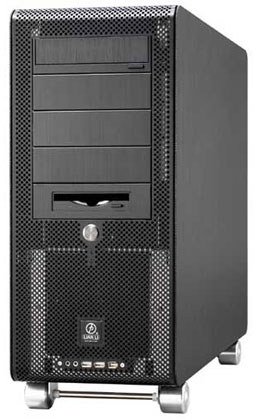
This is the raw canvas for this project, the Lian Li PCV1000B.
Choosing the image
Choosing the right picture to etch is very important. If you are a beginner try and choose images without any shadows and too much detail - a simple, clean line is a lot easier to get right, so stick to clear, line-based designs. If you want to do something a little more difficult, try adding in some very fine detail. A good way to play with an image is to use Photoshop - you will be able to use the various tools to trace over a very complicated image on a new layer and create a simple line drawing from it.
How do I get my sketch onto the chassis?
When you've got your image printed and ready to engrave, you'll need to apply it to the case so that you have some lines to follow - the easiest way to do this is by using carbon paper. It's a simple technique: put the carbon paper where you want your etch, take the line drawing, and use a (tough) pen to trace over it. This will transfer it to the carbon paper, which is very thin and should transfer the tracing to the case's surface. If you've got some major artistic talent you could do it by freehand, but that is much harder.
Other things to Consider
Make sure that you have a good working position - a kitchen table or something like that works fine for me.
Don't rush, take it slow and be careful, because one mistake can be the difference between a great engraving and a poor one.
If you have some pieces of left-over plexi or even an old chassis, use that for practice before you attack your main case.
Right Side Engraving
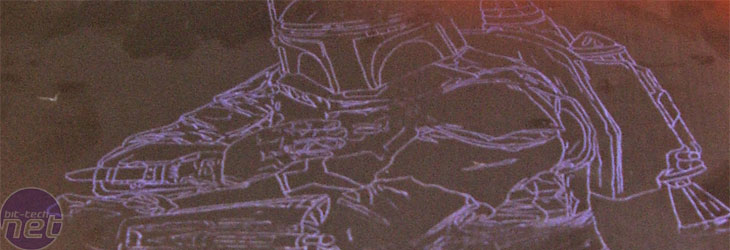
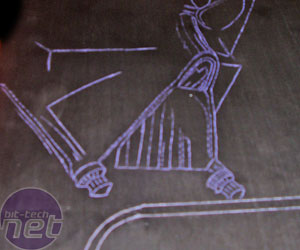
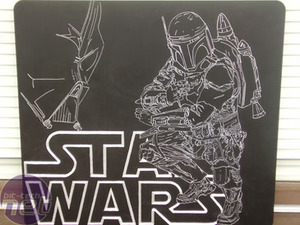
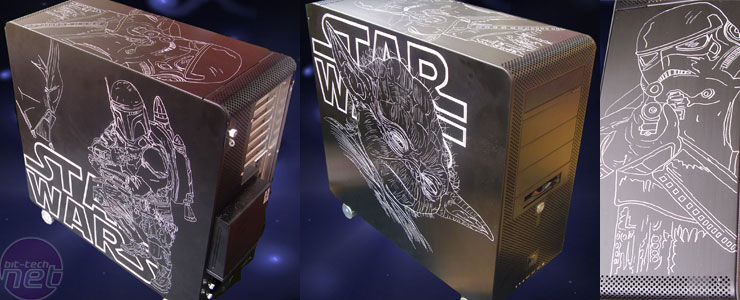
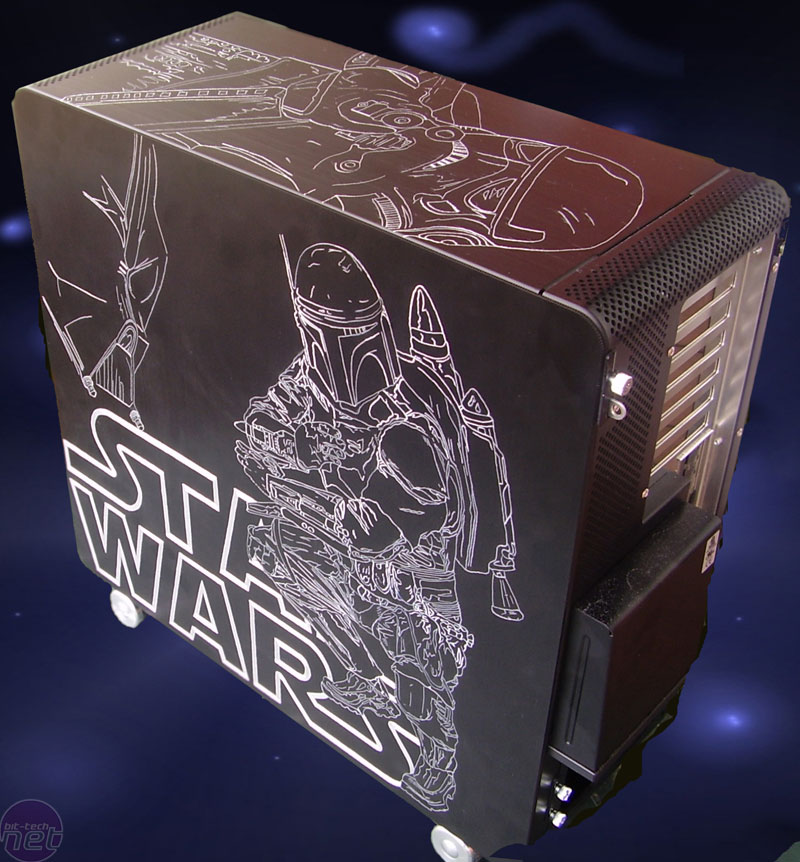
I came up with the idea of doing the Dark Side on the right of the case and the Light Side on the left. On the right, I decided to have Boba Fett.
Here you can see the clean and clear lines that the carbon paper makes on the case. A good sketch makes it much easier to work with the Dremel on top.
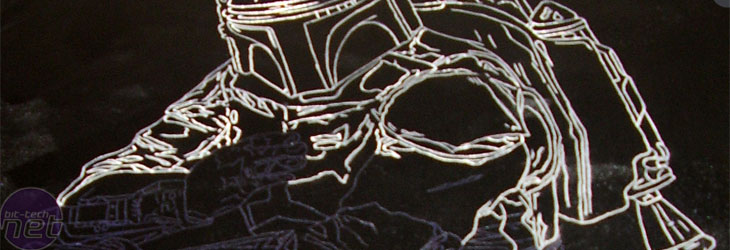
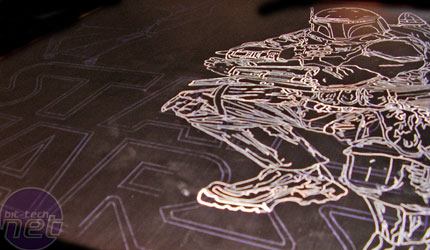
With Boba Fett done, an evil dude named Darth appears...
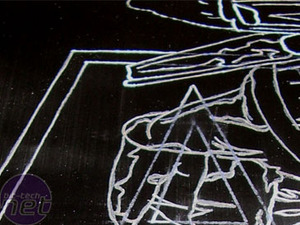
Here's the final result. As you can see engraving on black aluminum gives incredible sharp and crisp lines. This also means that mistakes show too - be careful not to make any big ones! Whilst the engraving might look weird up close, it looks great when seen as a whole.
Left Side Engraving
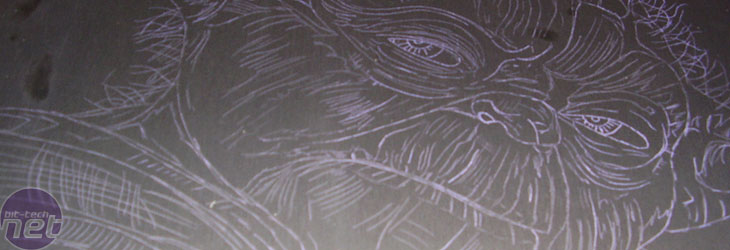
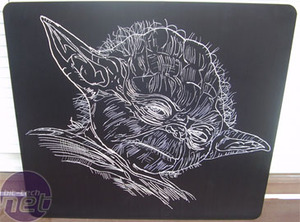
The original sketch of Yoda on carbon paper had quite a lot of tight detail.
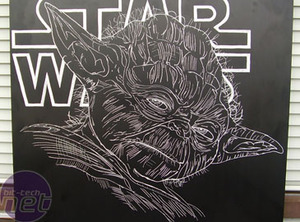
Unfortunately, I had to tone down the detail a little when doing the engraving, since the design looked a little too 'busy'. However, with that done, the left side needed something more - another Star Wars logo did the trick. This made Yoda appear more clear and helped to get the right balance in the design.
Time for another coffee break, and then on to the top of the case.
Top Etch
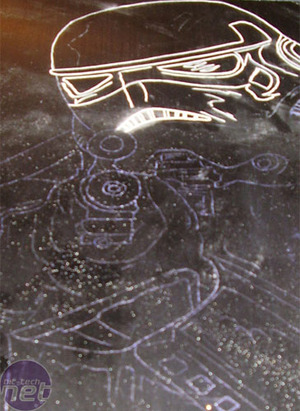
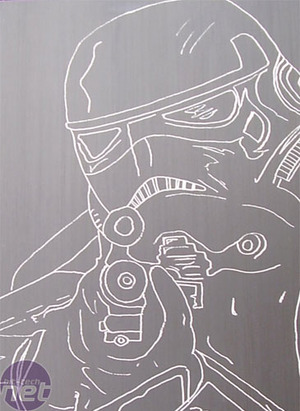
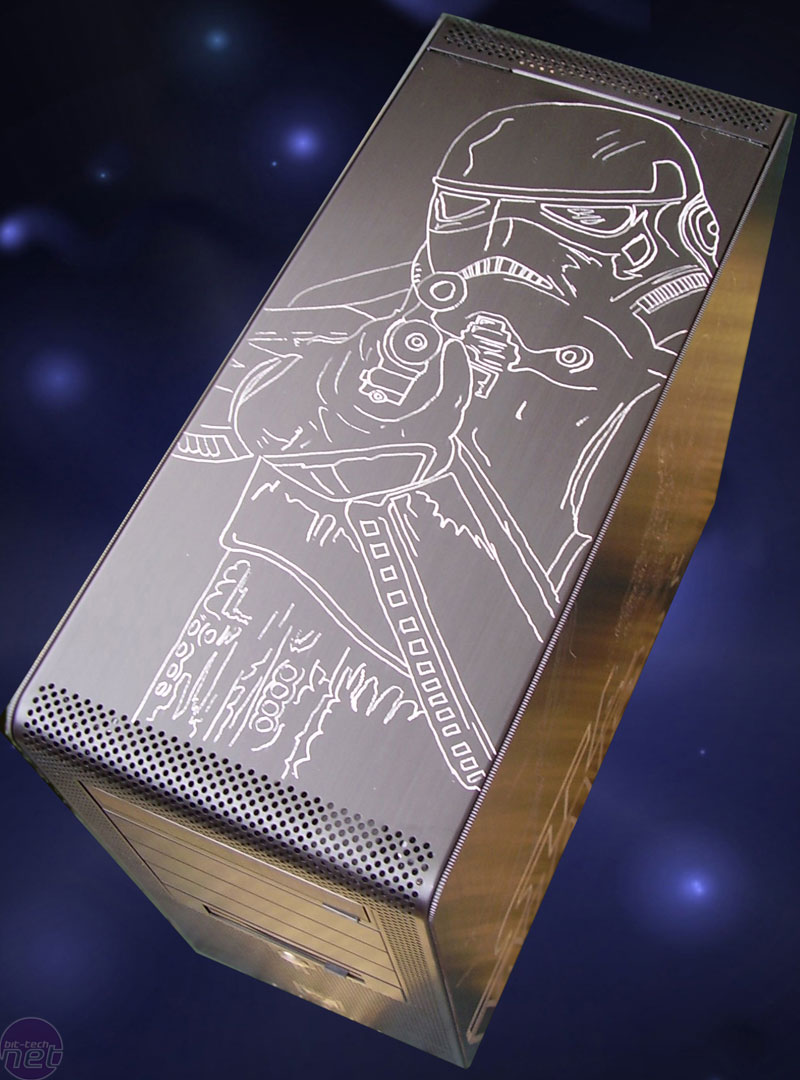
This was by far the easiest engraving to do, but it turned out quite well. With an hour's work, an angry Stormtrooper was giving me the evil eye from the top of the case.
The Final result
Here are some candyshots of the finished case:
You can click the thumbs below for 800px large versions...
So this was my latest project... I'm sure I'll be busting out the Dremel for some more action very soon!
If you're interested in the tools I used to complete this project, here's the run-down.
Dremel Multi Professional.
Dremel Flexible shaft.
Dremel Diamond engraving bits 7144 and 7134.
Pelikan Plenticopy 200h carbon paper.
Time, patience and coffee!
A big thanks to Gtek.se for providing the case and making this project possible, you guys rock!
To everyone else i will just say.. Grab your Dremels and make some art!
[i]This article can be found in its original Swedish version at SweClockers.com.
Arduino Severino USB/Serial DIY
-
Montei o projeto AVR-CD [1] com o ATmega8 e estou utilizando para a
comunicação com a Arduino Severino.
O driver da porta serial virtual funcinou no Mac OS...
Chest of Drawers
-
This chest of drawers is to replace the cheap stand (with no storage) that
was previously holding up our parrot's travel cage. She only lives with us
a few...
LIFI – AUDIO TRANSMISSION THROUGH LIGHT
-
Gagan jain has built an interesting rig called the LIFI, it allows a
simple transmission of audio using an LED for sending the audio signal and
a solar c...
Cleaning Solar Panels – 8% Efficiency Difference
-
Four years ago I posted the article, “Cleaning Solar Panels – Does it
make much difference†. In that article I calculate the difference
between my d...
Bitcoin: a moeda do crime?
-
por Marcos Elias Você já deve ter visto por aí alguma ligação da moeda
digital Bitcoin com a criminalidade. Direto citam isso em notícias ou
documentários ...
Absolutely Epic 3D Printed Atlas from Portal 2
-
Odds are, you’ve played either Portal or Portal 2 and thoroughly enjoyed
yourself in the process. And we can’t blame you – the game is incredibly
unique a...
LED Mag-Lite now available
-
Today while shopping I noticed a 2D Mag-Lite with a 3W LED instead of an
incandescent lamp. This is an OEM LED, not a retrofit. I bought it at Wal
Mart for...
Can You Vacuum Seal Cucumbers
-
[image: Can you vacuum seal cucumbers]
Can you vacuum seal cucumbers
We have enough for eating fresh but not enough for freezing. She asked,
“Can you fre...
Vantagens de Trabalho de Rede
-
Partilha de recursos físicos da rede: discos ou outros dispositivos de
armazenamento de informação, impressoras, modems ou outros meios de ligação
à Intern...
Nvidia GeForce Serie 9
-
A nvidia acaba de lançar a nova serie GeForce, a serie 9. O novo "high end"
da Nvidia, a 9800 GX2, tem 1 GB DDR3 e memórias a 2000MHz.
http://www.techzone...
Memória Ram
-
*O que é uma memória ram ?*
Tal como não poderia deixar de ser e visto o facto de já o termos feito
antes de avançar-mos no blog temos de establecer alguns...
Pen Drive
-
USB Flash Drive, também designado como Pen Drive é um dispositivo de
armazenamento constituído por uma memória flash ou seja, pode-se adicionar
ficheiros ...
The Wall - Curiosidade
-
*Roger Waters The Wall Berlim*
No concerto de Berlim. no final da musica "Mother", ficaram sem som!
Roger Waters pôs-se a dançar sapateado em frente a 300 mi...


Sem comentários:
Enviar um comentário