Six 5-port USB add-in cards plus coffee warmer = USB hotplate to cook dinner on. Only In Japan
Have you ever been excited about some new hardware you've bought, only to have a non-techie parent / friend / co-worker scoff dismissing your new toy? My favorite is that age-old rhetorical question, "Ah, but can it cook me dinner? Because at that price, it should..."
To one enterprising Japanese blogger, that answer is "Why yes, it can!"
He posts, following the humiliation of the failed USB Fried Egg experiment, that he needed to take a leaf out of the Tim "The Toolman" Taylor Cookbook and go for...MORE POWER. 30 times more power to be precise - six PCI USB cards with five ports per card, for a total of 30 ports.
Take a regular USB coffee warmer (now pathetically tame in comparison), wire everything up with a bunch of resistors under the hotplate and we're cooking with gas USB!
The proof is in the pudding beef, as they say (Stop it! -Ed)... and by all accounts, it works a treat. He has even posted two videos where you can actually hear the beef sizzling! Naturally, it's a rather complex solution to a problem that doesn't actually exist...but as a "hey, why not?" project, it's definitely hot property. And it could be a handy pizza warmer at your next LAN event.
You can read the original blog, or take your chances with Google Translate beta. Usually the image hosting for blogs like this fall over at the mere mention of a Digg or Slashdot so we have preserved the highlights below just in case.
Do you feel like Chicken Tonight? Discuss this in our forums.
I love innovation – who doesn’t? That said, my tastes lie specifically in the kind which make my life simpler and easier. We’re talking email over post, wireless over wired, LCD over CRT and potentially now ‘USBCell’ batteries over your traditional AAs.
Released as a teaser to the IT press over a week ago with the tagline ‘Time to recharge the battery market’, the details are finally out and they are oh so logical yet very cool.
Produced by Moixa Energy, USBCell batteries are simply batteries that recharge from any USB port. They require no separate recharging devices, cradles or cables and can be used exactly like a normal battery. The design itself is rather like a typical memory stick with its flip top lid and they could be set to deliver the same killer blow to the battery market that memory sticks did to floppy discs.
USBCell batteries have a capacity of 1300mAH which is in line with most NiCd and NiMH batteries though some do go all the way up to 2500mAH. It takes five hours to charge a completely flat battery and an LED on the side will light up to indicate charging, flash for 10 minutes after charging is complete as an alert and switch off after that.
Available now and costing just £12.99 for two AA USBCell batteries (including VAT and delivery from the company’s website) I’m forced to say something I never thought would pass my lips: I’m quite excited about batteries!
Mods are great things and, here at bit-tech HQ, we can’t get enough of them. We scour the Internets all day, everyday looking for mods great and small. Some of the ones we find are truly great, whilst others are truly bizarre.
We know that there are a lot of people in the bit-tech community that don’t have the ability to make some of the more fantastic modifications though or who are lacking the confidence to plunge straight into the deep end of the modding world. Those people want something smaller than a full case mod which they can pop their modding cherry with. So to speak.
Over the years we have seen a number of cool USB key mods, from Pez dispensers and plastic sushi to thumb drives inside realistic-looking human thumbs! USB key mods are great because the part are cheap, and the possibilities almost endless.
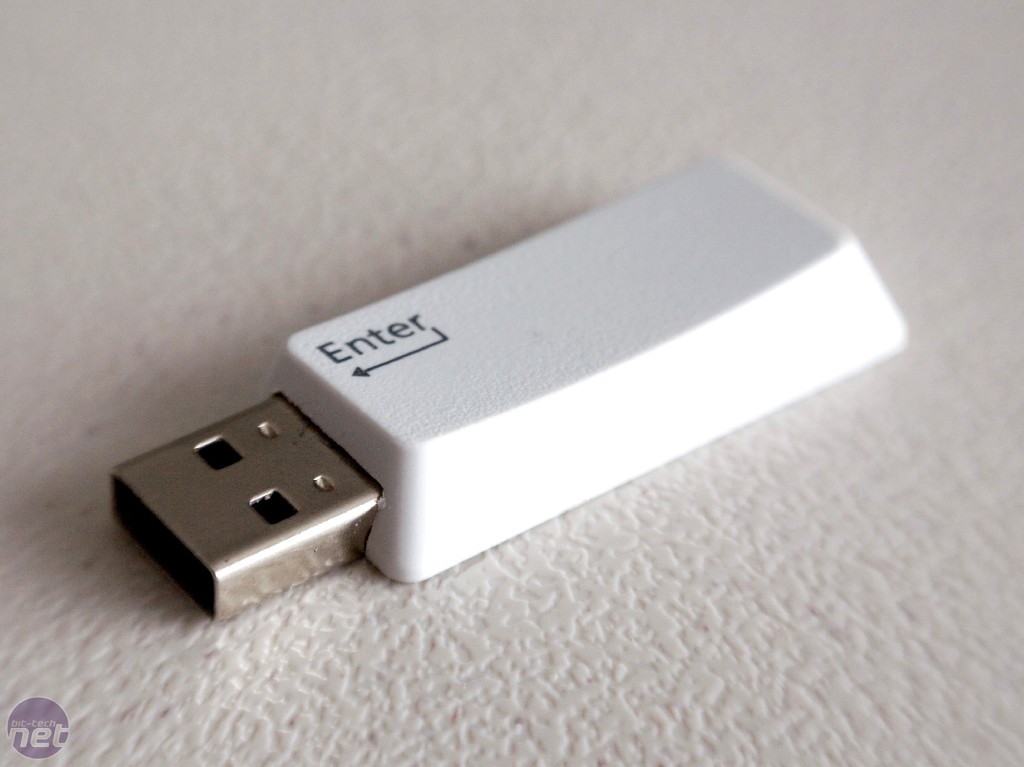
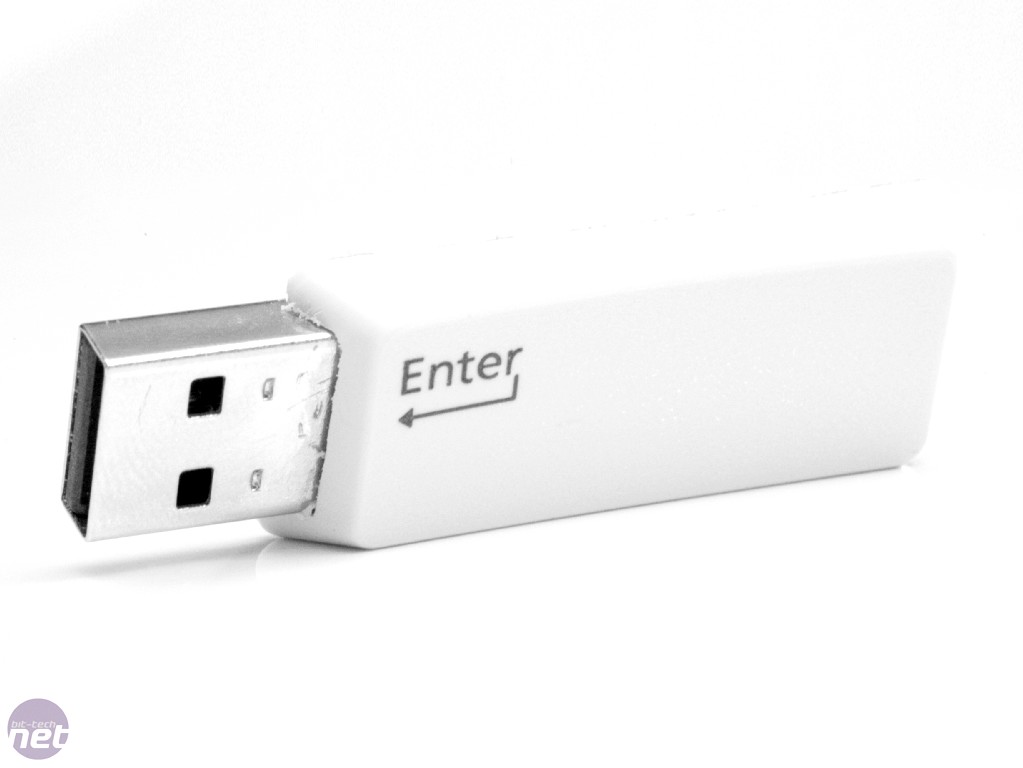
The latest is this, Project Enter the USB. It’s small enough that anybody can do it and it doesn’t require much in the way of tools, but at the same time it’ll leave you with a quirky little conversation piece for your next LAN party. So, whether you’re an engraver with Dremels for fingertips, or a n00b who doesn’t even know what the hell a Dremel is, the Enter The USB mod is a good one to try.
The only thing left for me to do is to hand you over to Kurtis Kronk, who originally wrote the guide for The Tech Lounge but who has agreed to be our guest modder on this occasion.
Introduction
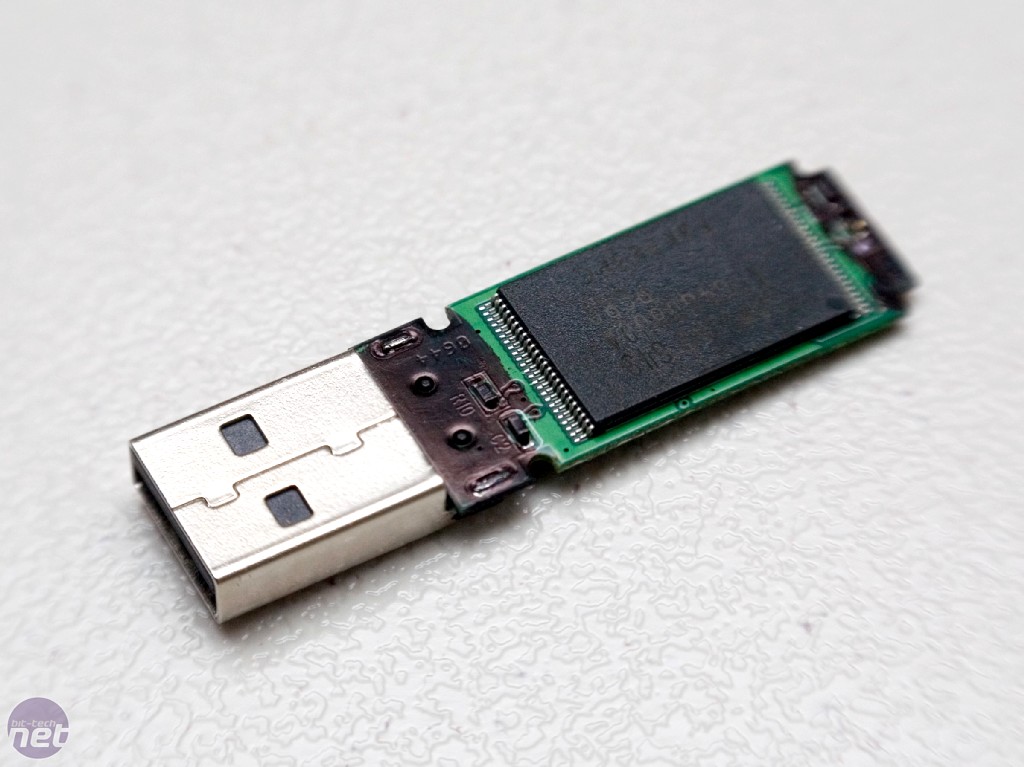
Back in March I posted about a Customized USB Drive that I thought was pretty cool. Someone took an el-cheapo USB drive and stuck it inside a Lego brick. In the same post I talked about a quick-and-dirty USB drive mod of my own, the Electrical Tape USB Drive. Basically, it was a clunker I picked up at CES that fell apart, so I removed what was left of the casing and wrapped it all up in electrical tape. Funny thing is, it's so fugly that when I recently forgot it in a school lab it was still there a few days later. Things might have been different had it been a SanDisk Cruzer or Corsair Voyager... or if it didn't have "62.4MB" written on it.
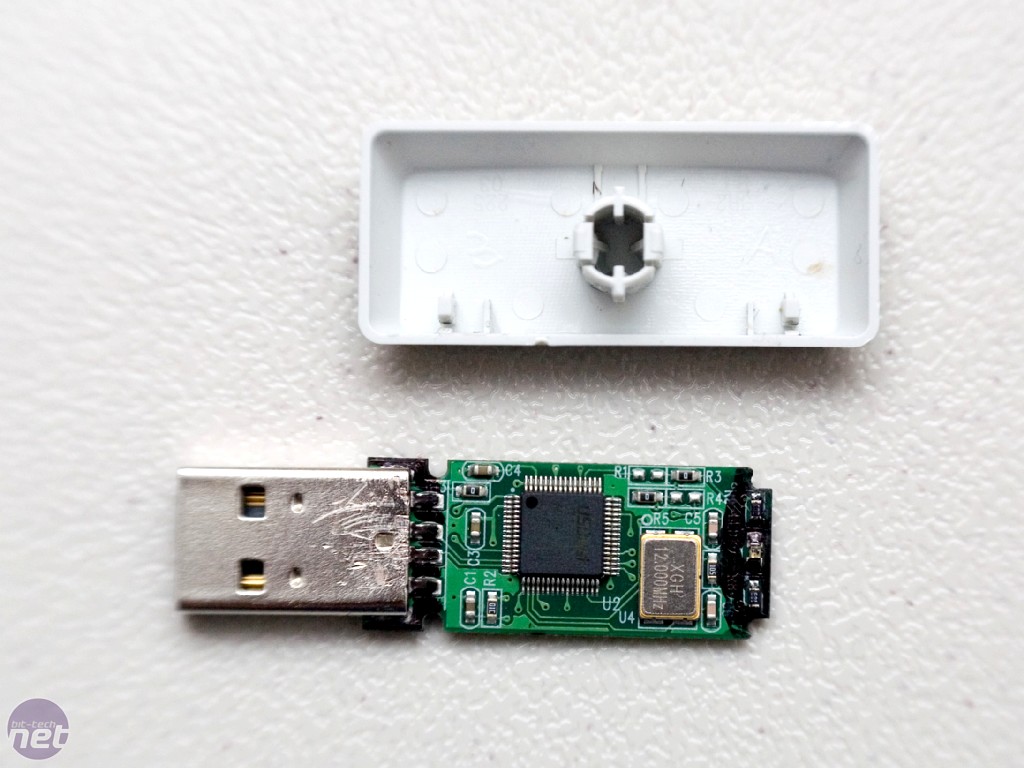
The USB drive in question, sans cover. Click to enlarge
As simple as my electrical tape USB drive mod was, I had a good time making it and decided to come up with another, different USB drive mod. Luckily, I had another USB drive, which I'd also received from CES, but this one was a whopping 512MB - yeah, they make 'em that big these days... Unfortunately, as it were, this one wasn't quite so fragile, and I actually had to punish it thoroughly before I could get the casing off. But I'm getting ahead of myself...
In this article I will walk you through Project: Enter the USB Key from conception to finished product. Step by embarrassing step. No detail spared. So in-depth you'll need a snorkel.
Let's get on with it...
Getting Started
Once I had successfully freed the USB drive from its lame shell, it was time to think. Whatever am I going to put this little thing inside? And so the search began. I thought about doing a better Lego mod - unoriginal; ChapStick - too thin (I've been informed that somebody else has made a ChapStick USB drive); film canister - too fat; USB cable shell - too short; gutted iPod - too spendy. Hmm... nothing on my desk was really striking me as a great idea. So the search continued. To the closet! As I rummaged through piles of miscellaneous electronics, cables, and computer accessories, I paused as I held an old keyboard in my hand.
Removing the key, click to enlarge.
What to do with a keyboard, though? The PS/2 connection isn't large enough to accommodate the USB drive, and the keyboard is a bit bulky to be useful as a USB drive. Think, Kurtis, think.
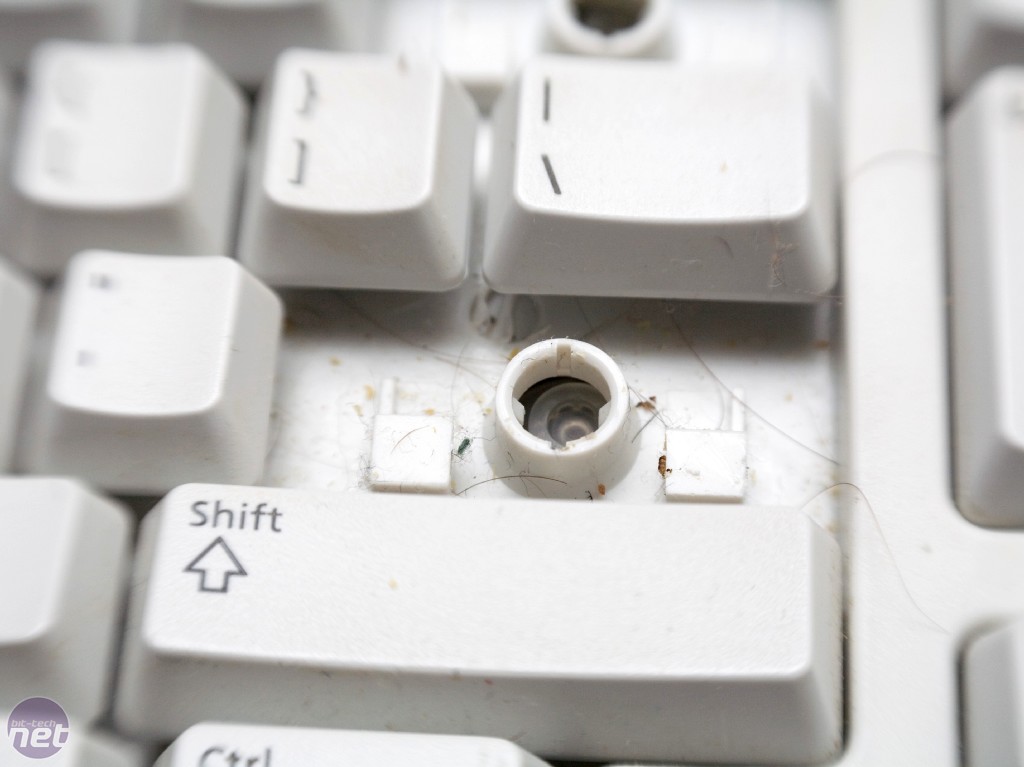
As I stared at the keyboard, I noticed some tasty treats (well, they used to be tasty) peeking at me from between the keys. Gross. Ah, wait a second, the keys! Oh sweet, blessed keys.
Yuck, it can get quite dirty down there! Click to enlarge, if you must.
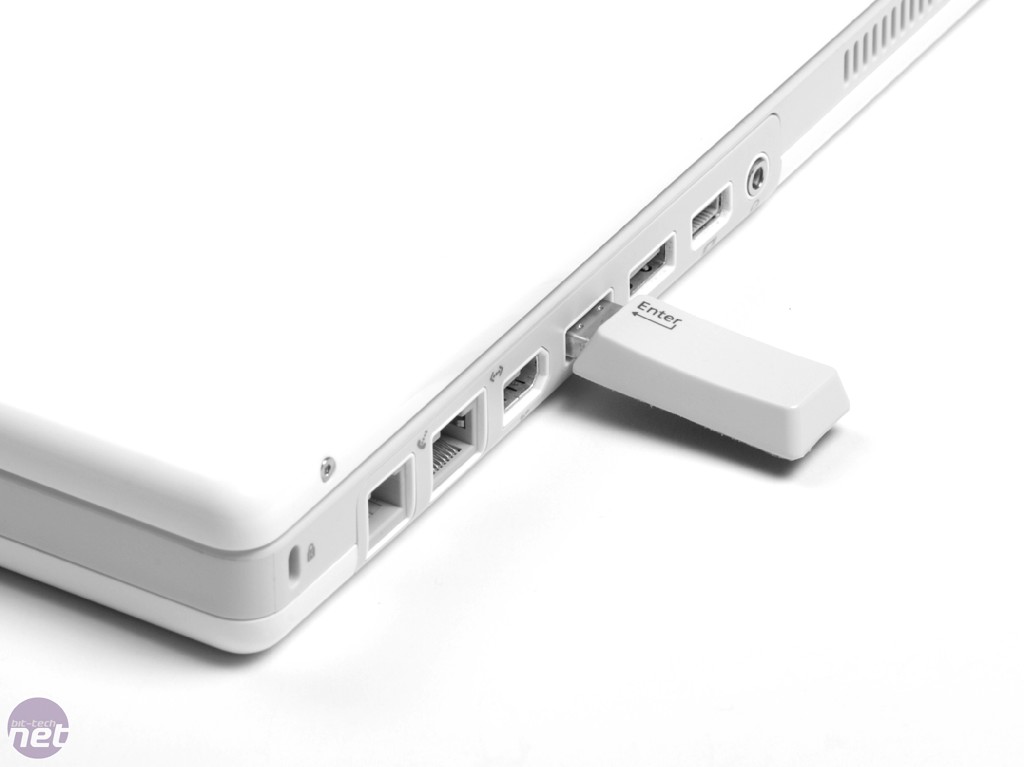
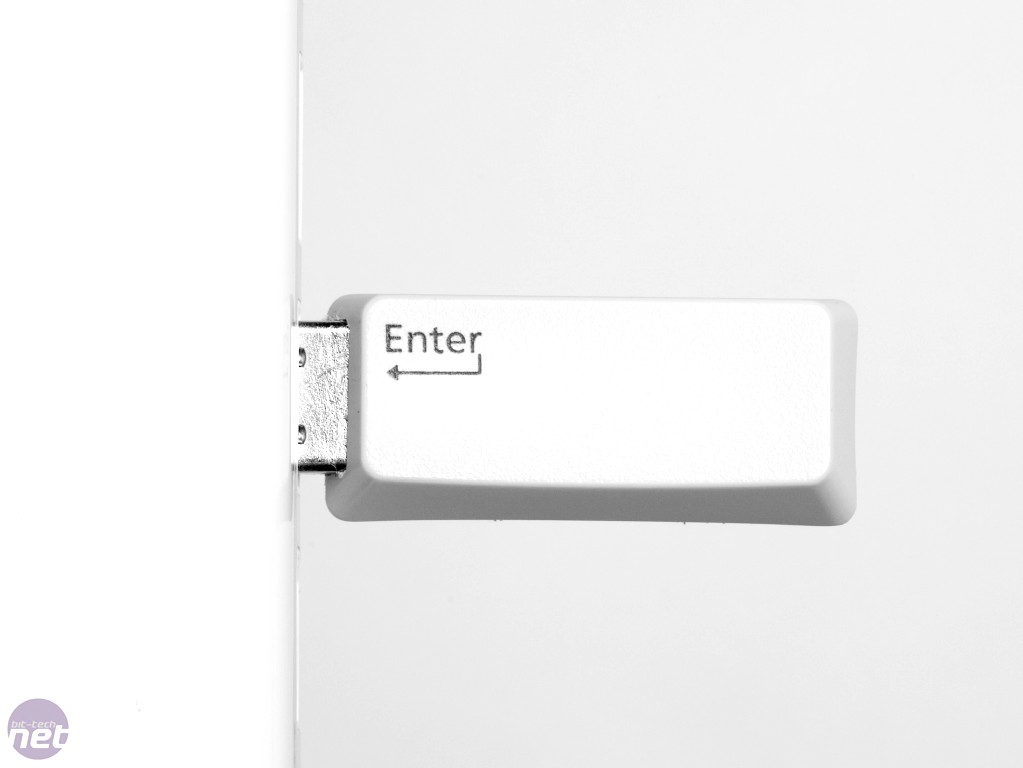
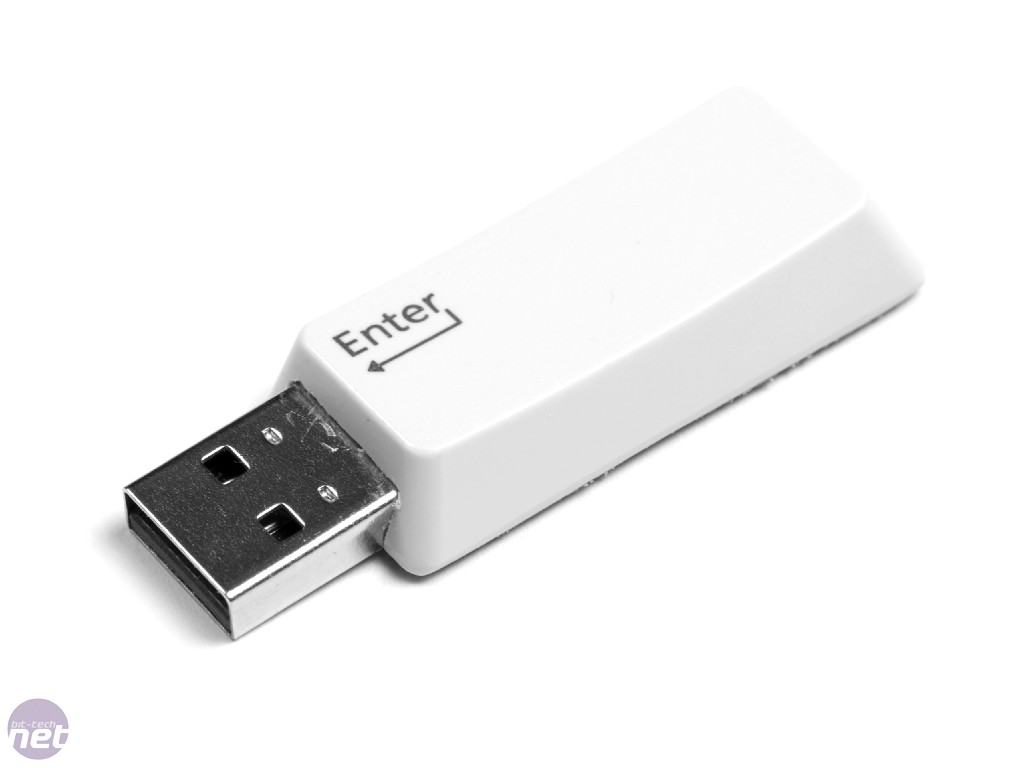
There are a decent number of keys on the keyboard which look like they could be just big enough to squeeze a USB drive inside: Tab, Shift, Backspace, Enter, Delete, and +. After careful consideration and a quick coin toss, I decided the Enter key would make the best case for my custom USB drive. It sort of makes sense, after all; "Enter" your USB drive into the USB port, with an arrow to help the less technically inclined. Tab is just plain confusing, with the two arrows pointing in either direction, Backspace and Shift don't sound cool, and +... well, + isn't even a word.
Stupid +.
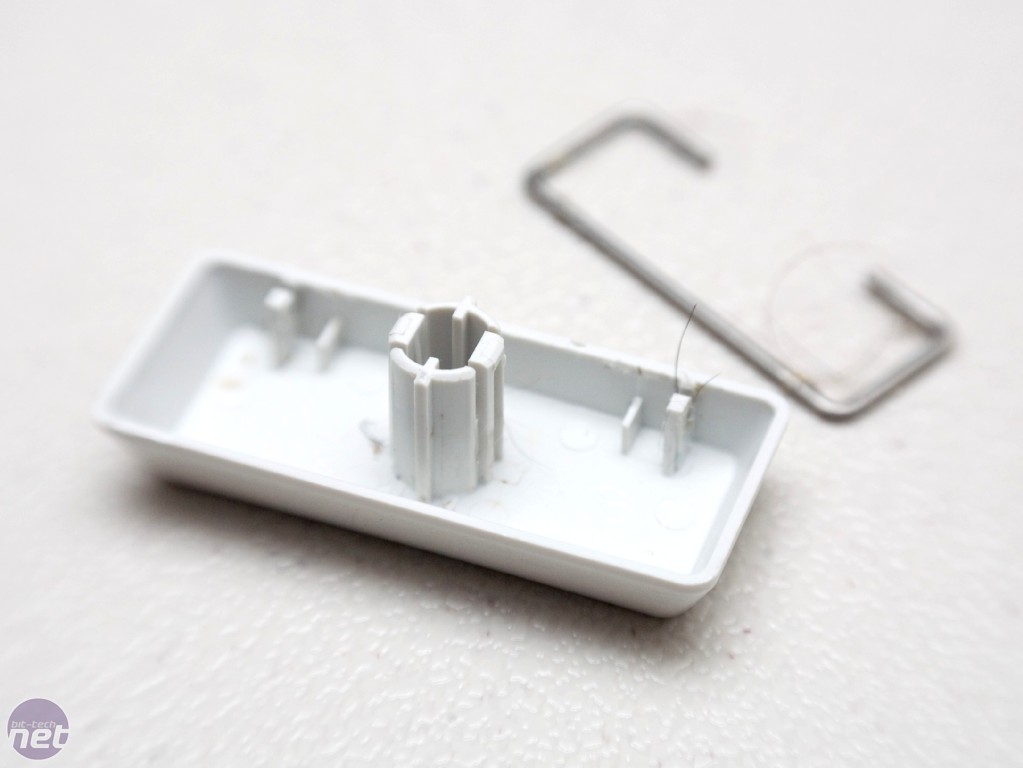
Remove the bracket and you can see how the mod is going to work. Click to enlarge.
Removing keys from the keyboard is easy enough. Using a small screwdriver you can gently pry them off. In my case, the Enter key had a bar stretched across its width to ensure uniform key presses - I just ripped it off. Enter key removed, I check to see if the USB drive fit... and it did - with a little room to spare.
Before hacking away at the Enter key, I decided to perform a practice run on the Backspace key (I only had one old keyboard to work with and didn't want to ruin it, after all). And I'm glad I did.
The Practice Run
As I mentioned, I started with the Backspace key for a test-run. My plan of attack was as follows:
Dremel a notch into the side of the key.
Sand edges smooth.
Place the USB drive into the key.
Pour clear silicone into the key to secure USB drive into place and to allow the back side to be see-thru. However, for the practice run, I actually skipped steps 1 thru 3 because I was mainly concerned with how well the silicone would work as a filler material.
Debrief
I was really glad I did a practice run. The day after I finished applying it, I was not happy with the clarity of the silicone; it was too cloudy. It was also a bit softer than I wanted.
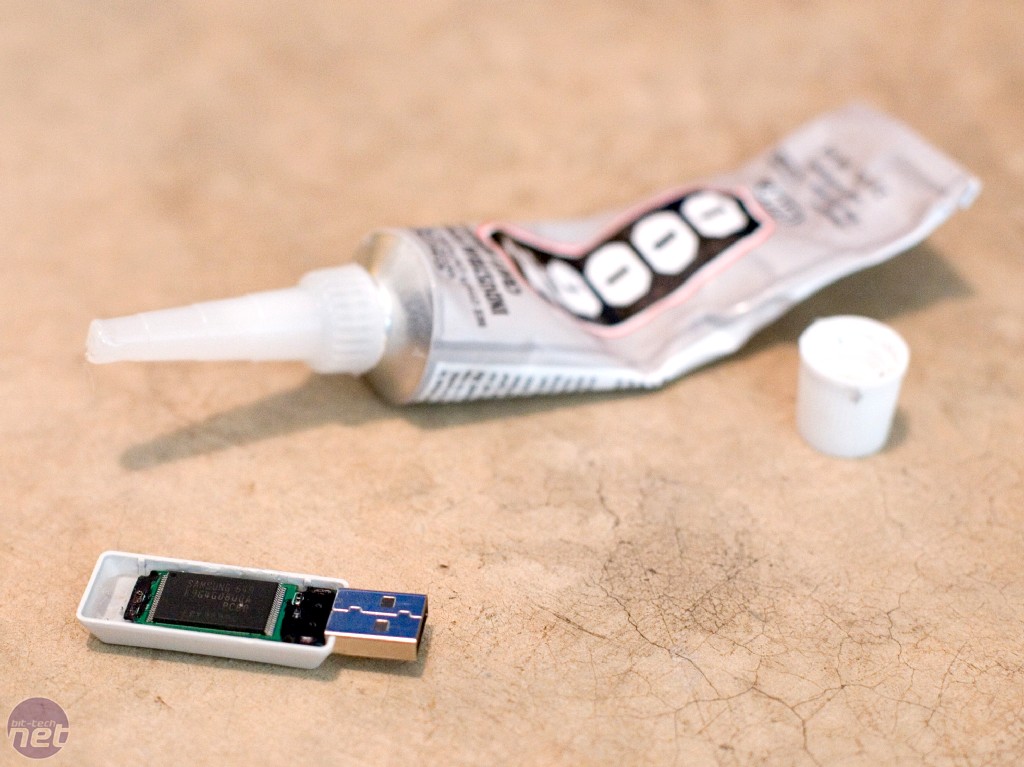
So, I decided to use something else for the real thing: an industrial strength adhesive called E6000, which my friend Brian has used in the past and recommended. That being said, about a week later I checked the silicone again and found it to be much harder. Apparently, it just needed more time to set. Still, the clarity wasn't quite as good as I wanted, so I still planned to use E6000 in place of the silicone for the real thing.
The Real Run
After the practice run, my plan of attack remained mostly the same, except for the first and last steps:
1. Remove clutter from inside the Enter key. 2. Dremel a notch into the side of the key. 3. Sand edges smooth. 4. Place the USB drive into the key. 5. Pour E6000 industrial strength epoxy into the key to secure USB drive into place and allow the back side to be see-thru.
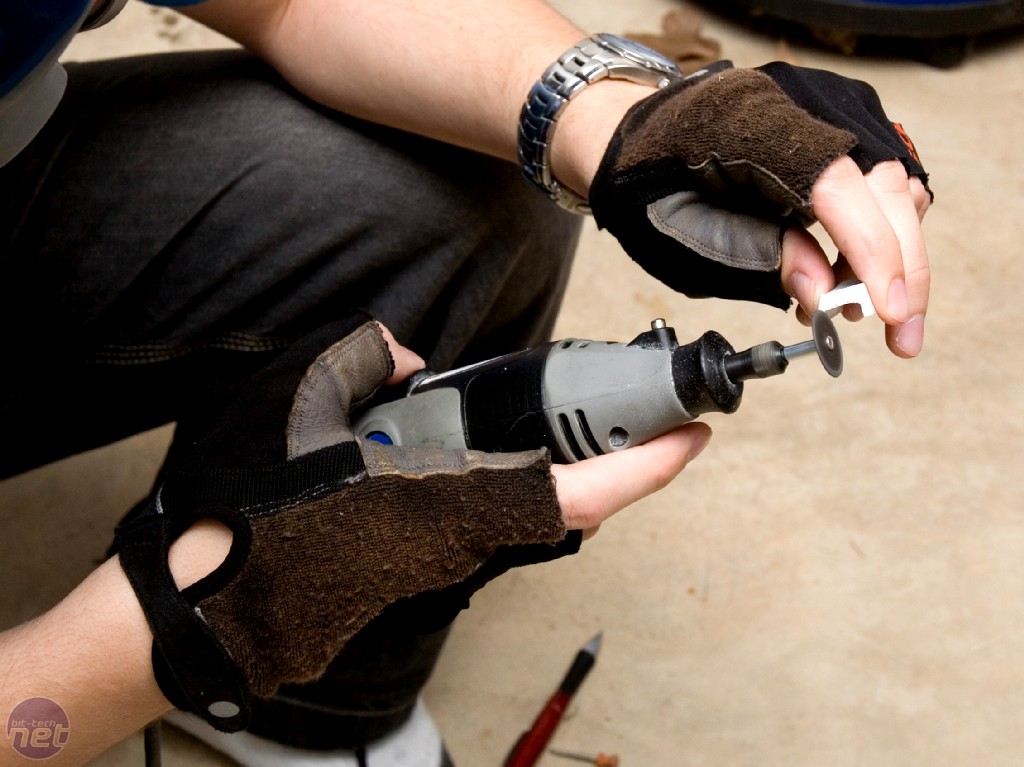
Standard attire for any serious modder. Click to enlarge.
Before pulling out the Dremel, I donned my protective gear. Kids, don't try this at home. I'm a trained, erm... heh... professional. Yeah.
Step 1:
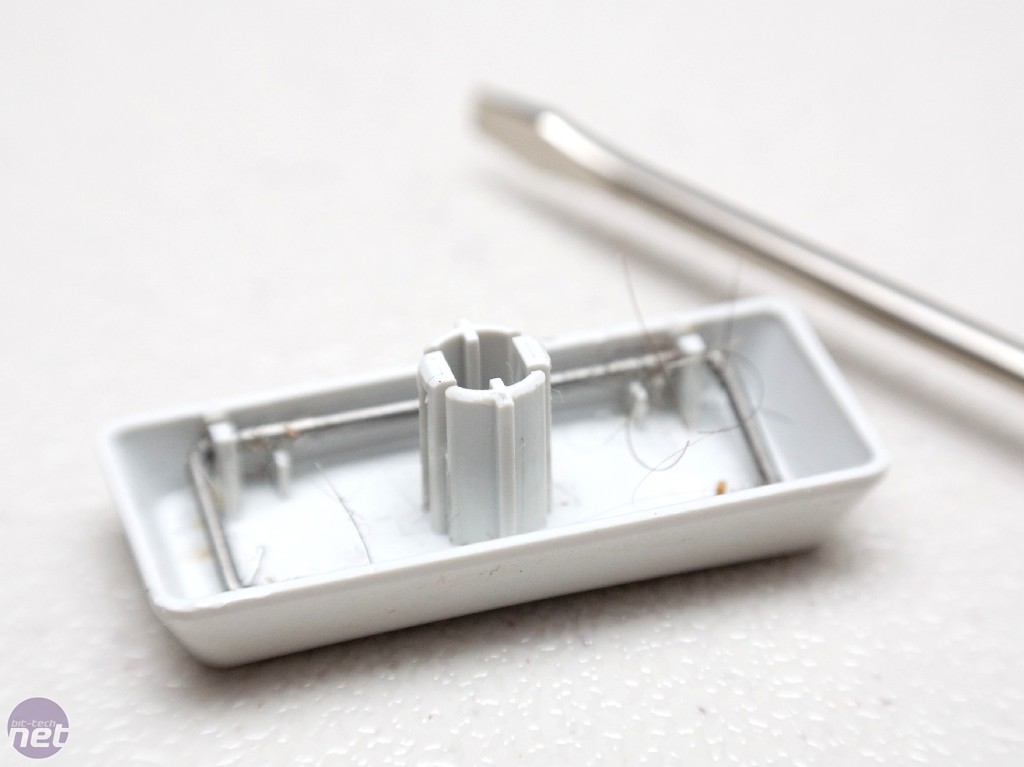
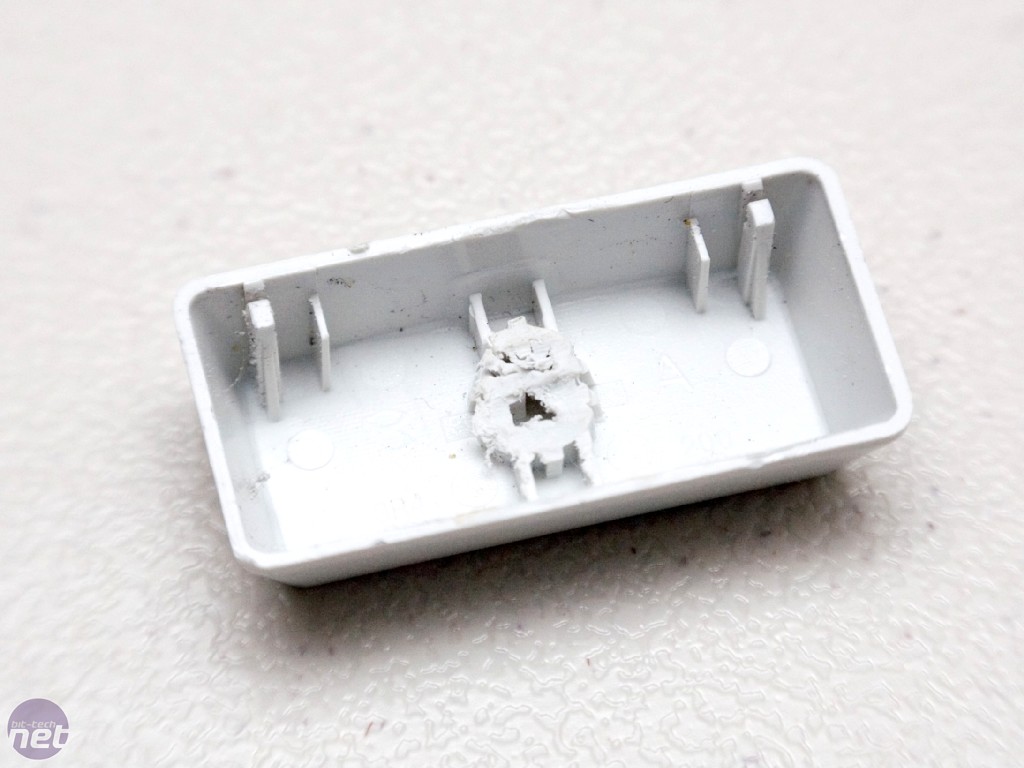
The first thing I needed to do was get the little stub in the middle of the enter key out of my way, as well as the little pieces of plastic jutting out that supported that bar I removed earlier. For the stub, I bashed the key with a large stone. No... why would I do that? Safety in mind, I proceeded with my Dremel and fingerless gloves.
This is where the USB drive will sit. Click to enlarge
The cutting wheel was used to cut in some notches first and then the grinding stone was used to actually remove pieces. Using only the grinding stone on plastic tends to melt it all into one big sticky mess. By cutting notches first, I was able to use the grinding stone pretty much exclusively to remove the little plastic pieces that supported the bar.
Step 2:
Before cutting a notch into the side of the Enter key, I grabbed a pencil and the USB drive to mark approximately how far I needed to cut. Once again I used the notch-then-grind method with the cutting wheel and grinding stone for the side of the Enter key.
Step 3:
I was able to clean it up pretty well with the Dremel, and then put on the finishing touches with some fine grit sandpaper. Care had to be taken with the sandpaper to not round any corners or edges, though.
Step 4:
With all the necessary cuts having been made, it was time to place the USB drive inside the Enter key. The fit was perfect, with a little bit of wiggle room.
Step 5:
Now for the fun: pouring in the epoxy. The tricky thing was that this part had to be done a bit at a time, rather than all at once, to keep the epoxy from flowing out of the notch we just cut.
A plan comes together. Click to enlarge
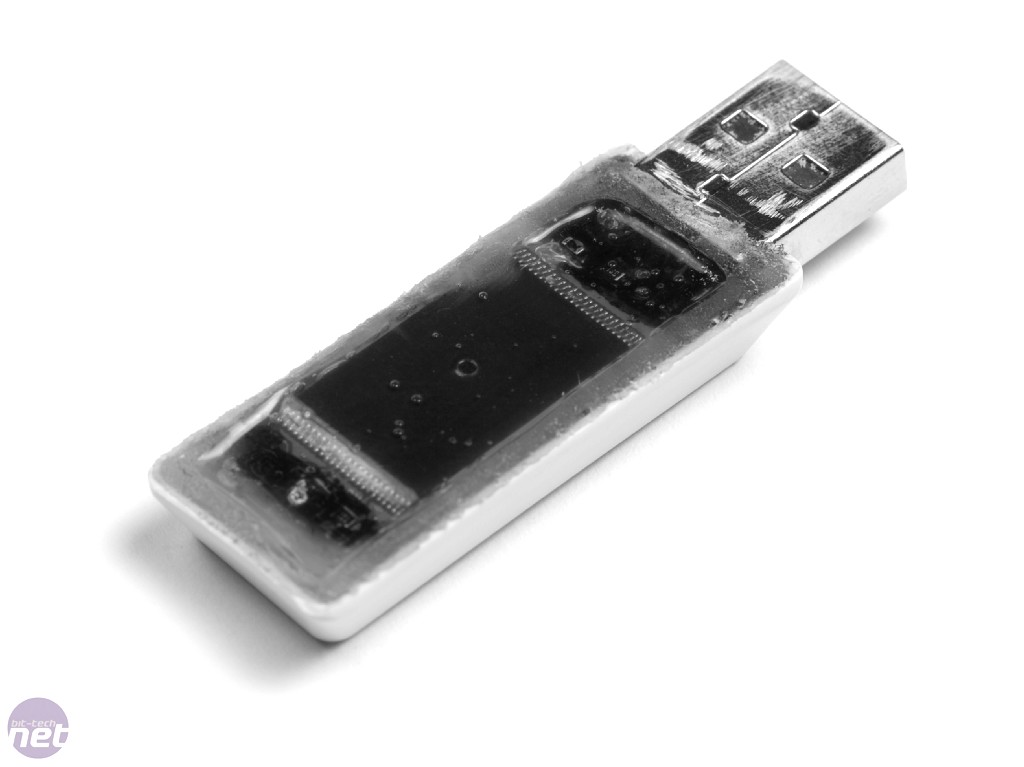
So I started by filling the key up to the notch and then setting the USB drive back in place on top of it. I let it set for 24 hours, then added a bit more, and so on, until silicone was up to the top. Once I was completely finished, I let it set for another few days before messing with it, since I used a good bit more epoxy than your typical application.
Conclusion
One extra finishing touch that I didn't anticipate was that, when the epoxy had finished setting, it was a little higher than necessary around the edges and wasn't totally flat. To correct this, I got the Dremel back out and used the grinding stone to get the edges roughly level. Then I grabbed some sandpaper of various grits (from 400 ~ 2,000) and got the epoxy surface flat and smooth to my satisfaction.
It isn't perfect and, if I had it to do again, I would have thought of a better way to make the epoxy nice and level without having to take any corrective measures after the fact. I've also thought about whether I should have chosen an opaque filler material, but then there is the matter of painting it to match the key. Overall, I feel Project: Enter the USB was a success.
If you've got a great idea for a USB drive mod, I encourage you to give it a shot. It's cheap, relatively simple, and lots of fun. Feel free to share your mods in our forums, or even submit your project log to go on the front page of bit-tech.
Enter the USB - Photoshoot
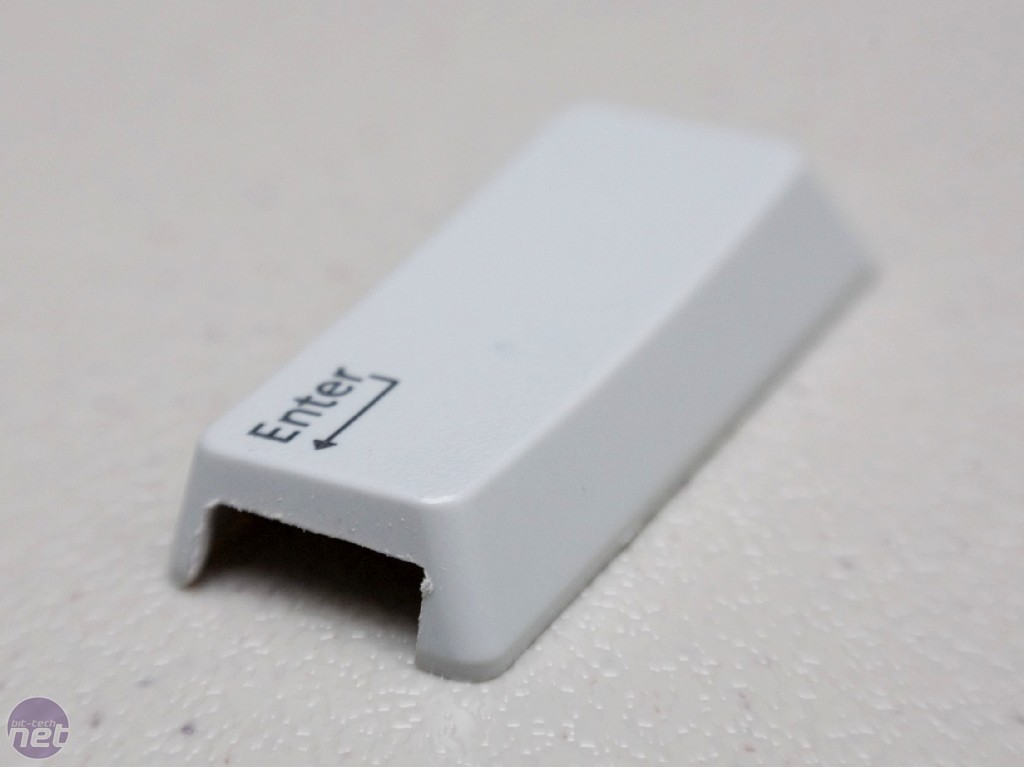
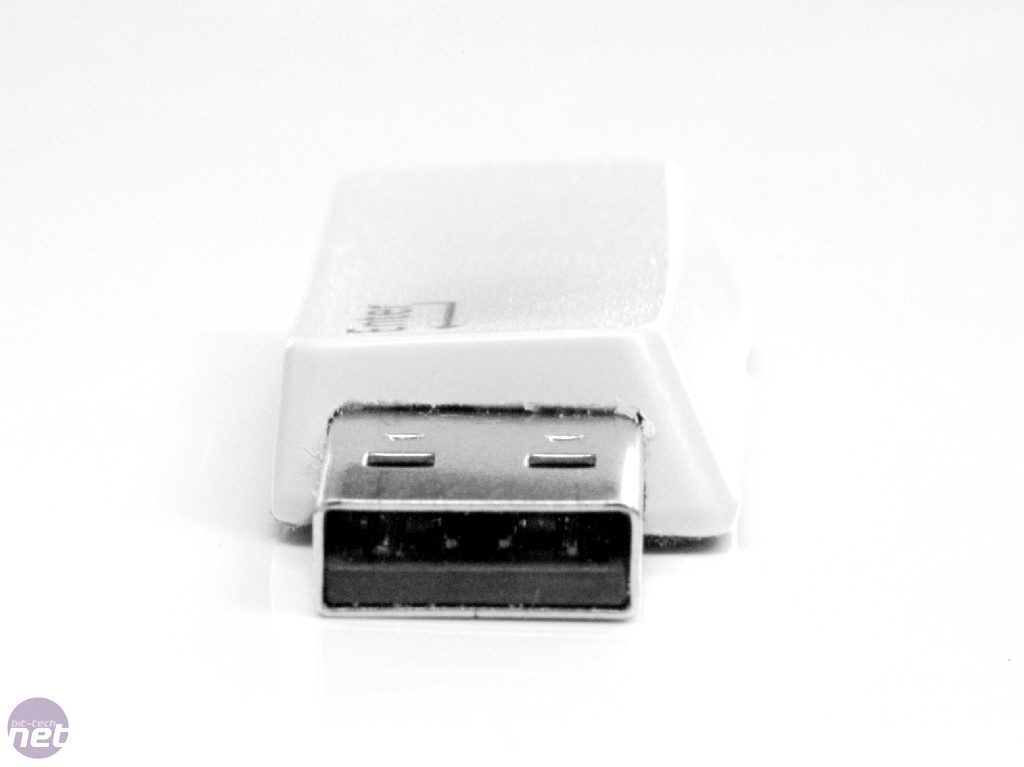
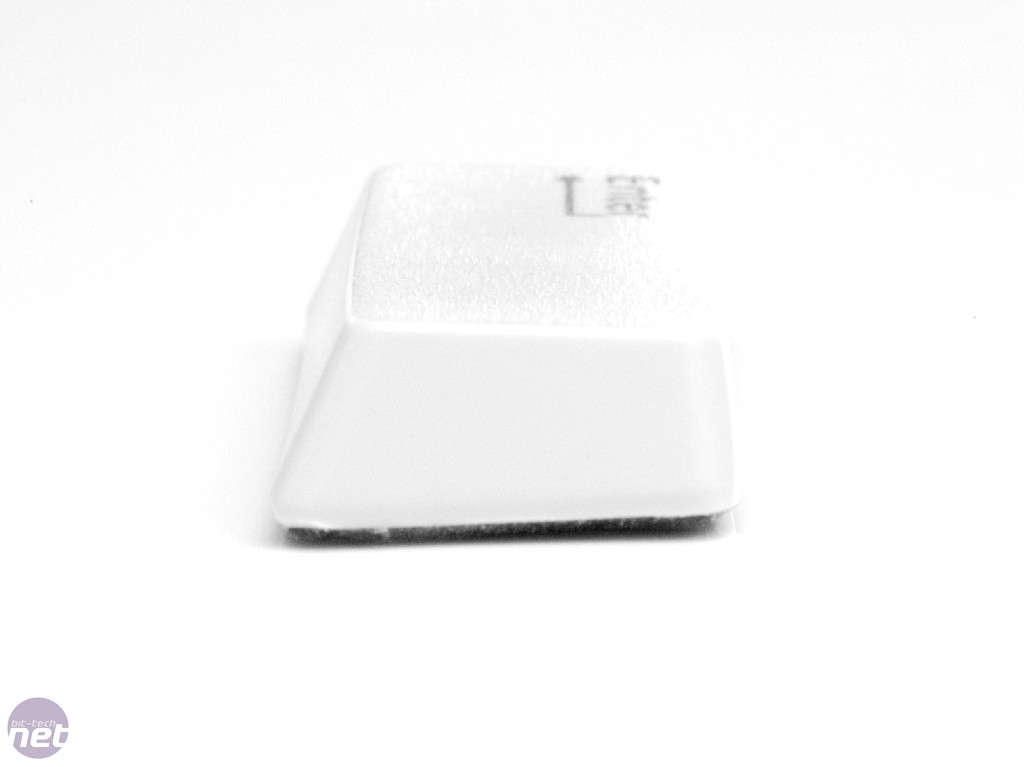
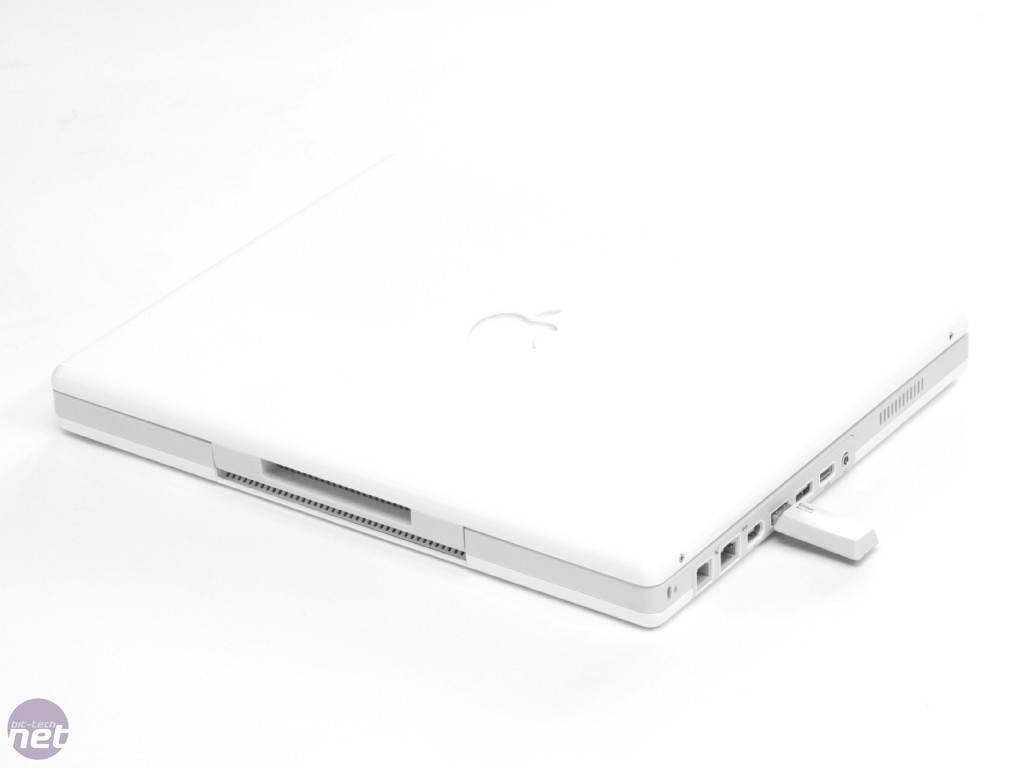
The finished article, check out the sweet pictures below!
This article was originally printed at The Tech Lounge and has been republished with permission.
Author: Dave Williams Published: 10th December 2001
Simple Fan Speed Control Here is a simple mod to allow the speed of any 12V fan to be varied.
All we need to do is insert a rheostat or variable resistor in the 12V wire to the fan. The rheostat should be rated at least 3 Watt, (for fans up to 10Watt), and have a resistance of 20 – 50 Ohms. If you are using this mod on your CPU fan then use the 20 ohm rheostat to prevent fan stall at the slowest speed setting.
Maplin Stock codes
20 ohm = FX40T
50 ohm = FX97F
In the procedure below I have used a 4way Molex extender cable, (the type used to extend PSU leads), but you can just as easily connect the rheostat directly to the fan wires if you prefer. If you choose to apply this mod directly to the fan wires, make sure you connect the rheostat to the 12V wire. (Red) You can double check by plugging the fan into the PSU and note which wire connects to the Yellow wire from the PSU. This will be the 12V wire. (Of course, do this with it turned off!).
BE VERY CAREFUL when fixing the rheostat to the case that there is no possibility of it shorting to the metalwork. If it does you will be directly shorting out the 12V supply…..Be safe, double check your work before switching on.
Right, let’s get on with it………
Step 1. The rheostat, extender lead and some heat-shrink sleeving for insulation.
Step 2. Cut and strip the ends of the 12V wire, (Yellow in this case, Red if fitting rheostat directly to the fan wire). NOT the red wire in the picture, the one on the fan.
Step 3. Slide some heat-shrink sleeving over the wire ends.
Step 4. Solder the wires to the rheostat. Note which 2 out of the 3 rheostat terminals are used. This way, turning the rheostat clockwise will increase fan speed. Don’t get the heat-shrink Sleeving too close when soldering or it will shrink and not fit over the terminals when you are done.
Step5. Slide the heat-shrink over the soldered terminals and heat with a hairdryer to shrink it !
Gratuitous behind shot of the soldered rheostat
Nearly finished.
Step 6. Fit some heat-shrink over the unused rheostat terminal to help prevent any short circuits when fitted in the case.
Step 7. Decide on a suitable location for the rheostat and drill a hole in the case for it. Surround the area with a layer of insulation tape for added protection against short circuits.
Step 8. Fit the rheostat and plug it in. Here it is controlling an 80mm Delta “Screamer” on the CPU cooler.
Step 9. This is what it looks like from outside the case.
How Satellite Phone Works – Know Everything
-
Pinned onto Articles
[ By Electronics Infoline Editorial Team ] Feature Image by Mali Maeder
from Pexels ==================================== The presen...
Arduino Severino USB/Serial DIY
-
Montei o projeto AVR-CD [1] com o ATmega8 e estou utilizando para a
comunicação com a Arduino Severino.
O driver da porta serial virtual funcinou no Mac OS...
Hello everyone
-
"Hello everyone! I'm excited to join this community of tech enthusiasts and
overclockers. Looking forward to sharing knowledge, learning new tips, and
cont...
I Used AI to Build a Flat-Pack 3D-Printed Crate
-
TL;DR: I wanted a stackable crate for garage project supplies that could
print flat, assemble without screws or hinges, and still be parametric. I
could no...
Chest of Drawers
-
This chest of drawers is to replace the cheap stand (with no storage) that
was previously holding up our parrot's travel cage. She only lives with us
a few...
LIFI – AUDIO TRANSMISSION THROUGH LIGHT
-
Gagan jain has built an interesting rig called the LIFI, it allows a
simple transmission of audio using an LED for sending the audio signal and
a solar c...
Bitcoin: a moeda do crime?
-
por Marcos Elias Você já deve ter visto por aí alguma ligação da moeda
digital Bitcoin com a criminalidade. Direto citam isso em notícias ou
documentários ...
Absolutely Epic 3D Printed Atlas from Portal 2
-
Odds are, you’ve played either Portal or Portal 2 and thoroughly enjoyed
yourself in the process. And we can’t blame you – the game is incredibly
unique a...
LED Mag-Lite now available
-
Today while shopping I noticed a 2D Mag-Lite with a 3W LED instead of an
incandescent lamp. This is an OEM LED, not a retrofit. I bought it at Wal
Mart for...
Can You Vacuum Seal Cucumbers
-
[image: Can you vacuum seal cucumbers]
Can you vacuum seal cucumbers
We have enough for eating fresh but not enough for freezing. She asked,
“Can you fre...
Vantagens de Trabalho de Rede
-
Partilha de recursos físicos da rede: discos ou outros dispositivos de
armazenamento de informação, impressoras, modems ou outros meios de ligação
à Intern...
Nvidia GeForce Serie 9
-
A nvidia acaba de lançar a nova serie GeForce, a serie 9. O novo "high end"
da Nvidia, a 9800 GX2, tem 1 GB DDR3 e memórias a 2000MHz.
http://www.techzone...
Memória Ram
-
*O que é uma memória ram ?*
Tal como não poderia deixar de ser e visto o facto de já o termos feito
antes de avançar-mos no blog temos de establecer alguns...
Pen Drive
-
USB Flash Drive, também designado como Pen Drive é um dispositivo de
armazenamento constituído por uma memória flash ou seja, pode-se adicionar
ficheiros ...
The Wall - Curiosidade
-
*Roger Waters The Wall Berlim*
No concerto de Berlim. no final da musica "Mother", ficaram sem som!
Roger Waters pôs-se a dançar sapateado em frente a 300 mi...











 Mensagens